
Access rights
Access rights are permissions that determine the content and applications users can access and edit. In Odoo, these permissions can be set for individual users or for groups of users. Limiting permissions to only those who need them ensures that users do not modify or delete anything they should not have access to.
Only an administrator can change access rights.
Users
The access rights for individual users are set when the user is added to the database, but they can be adjusted at any point in the user's profile.
To make changes to a user's rights, click on the desired user to edit their profile.
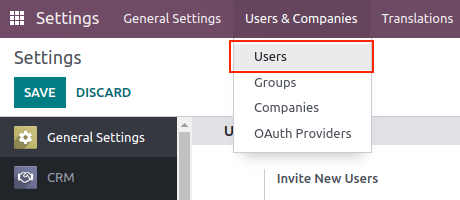
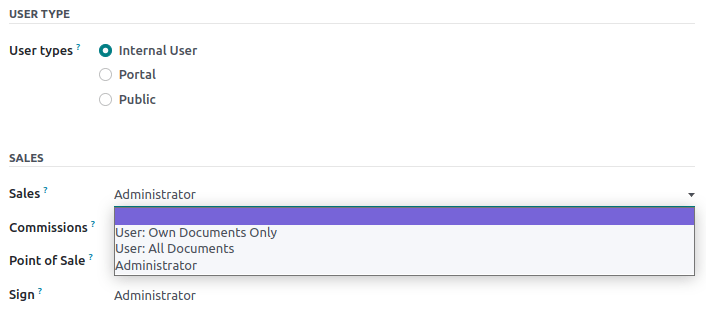
On the user's profile page, in the Access Rights tab, scroll down to view the current permissions.
For each app, use the drop-down menu to select what level of permission this user should have. The options vary for each section, yet the most common are: Blank/None, User: Own Documents, User: All Documents, or Administrator.
The Administration field in the Access Rights tab has the following options: Settings or Access Rights.
Create and modify groups
Groups are app-specific sets of permissions that are used to manage common access rights for a large amount of users. Administrators can modify the existing groups in Odoo, or create new ones to define rules for models within an application.
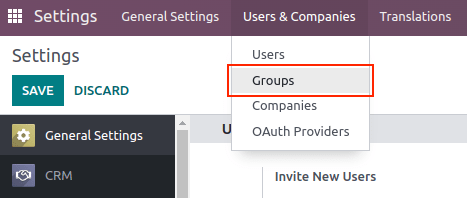
To access groups, first activate Odoo's developer mode, then go to Settings app -> Users & Companies -> Groups.
To create a new group from the Groups page, click Create. Then, from the blank group form, select an Application, and complete the group form (detailed below).
To modify existing groups, click on an existing group from the list displayed on the Groups page, and edit the contents of the form.
Enter a Name for the group and tick the checkbox next to Share Group, if this group was created to set access rights for sharing data with some users.
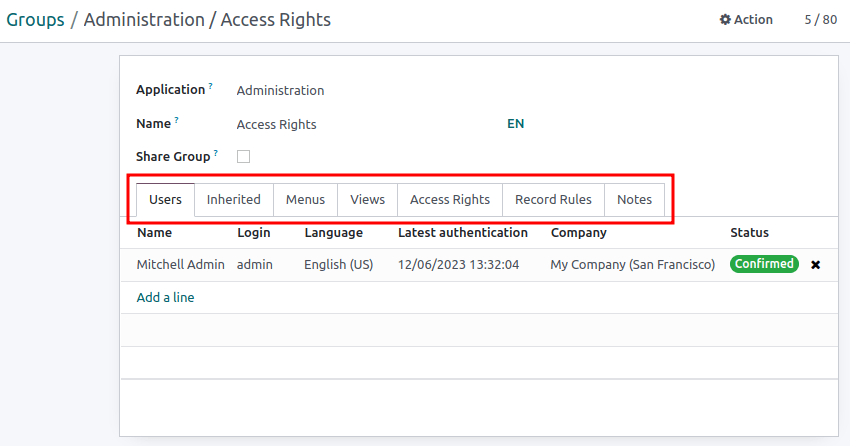
The group form contains multiple tabs for managing all elements of the group. In each tab, click Add a line to add a new row for users or rules, and click the ❌ (remove) icon to remove a row.
-
Users tab: lists the current users in the group. Users listed in black have administrative rights. Users without administrative access appear in blue. Click Add a line to add users to this group.
-
Inherited tab: Inherited means that users added to this group are automatically added to the groups listed on this tab. Click Add a line to add inherited groups.
-
Menus tab: defines which models the group can have access to. Click Add a line to add a specific menu.
-
Views tab: lists which views in Odoo the group has access to. Click Add a line to add a view to the group.
-
Access Rights tab: lists the first level of rights (models) that this group has. The Name column represents the name for the current group's access to the model selected in the Model column.
To link a new access right to a group, click Add a line. Select the appropriate model from the Model dropdown, then enter a name for the access right in the Name column. For each model, enable the following options as appropriate:
- Read: Users can see the object's existing values.
- Write: Users can edit the object's existing values.
- Create: Users can create new values for the object.
- Delete: Users can delete values for the object.
-
Record Rules: lists the second layer of editing and visibility rights. Record Rules overwrite, or refine, the group's access rights. Click Add a line to add a record rule to this group. For each rule, choose values for the following options:
- Apply for Read.
- Apply for Write.
- Apply for Create.
- Apply for Delete.
Superuser mode
Superuser mode allows the user to bypass record rules and access rights. To activate Superuser mode, first, activate developer mode. Then, navigate to the debug menu, represented by a 🪲 (bug) icon, located in the top banner.
Finally, towards the bottom of the menu, click Become Superuser.
To leave Superuser mode, log out of the account, by navigating to the upper-right corner, and clicking on the OdooBot username. Then, select the Log out option.