
Lot numbers
Lots are one of the two ways to identify and track products in Odoo. They typically represent a specific batch of products that were received, stored, shipped, or manufactured in-house.
Manufacturers assign lot numbers to groups of products sharing common properties, facilitating end-to-end traceability through their lifecycles.
Lots are useful for managing large quantities of manufactured or received products, aiding in tracing items back to their group, particularly for product recalls or expiration dates.
Configuration
To track products by lots, enable the Lots & Serial Numbers feature. Then, configure each product to be tracked by serial numbers on the product form.
Enable lots & serial numbers
To track products using lots, enable the Lots & Serial Numbers feature. Go to the Inventory app -> Configuration -> Settings, scroll down to the Traceability section, and tick the checkbox next to Lots & Serial Numbers. Then, click Save.
See also
- Tracking expiration dates
- Print GS1 barcodes for lots and serial numbers

Track by lots
Once the Lots & Serial Numbers feature is activated, configure individual products to be tracked using lots. To do this, go to Inventory app -> Products -> Products, and choose a product to configure.
On the product form, go to the Inventory tab. In the Traceability section, select the By Lots option in the Tracking field. Now, new or existing lot numbers can be assigned to newly-received or manufactured batches of this product.
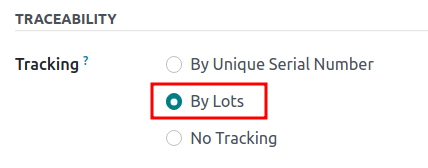
Assign lots for shipping and receiving
Assign new lot numbers to incoming goods on the receipt form. When shipping outgoing goods, select products with specific lot numbers on the delivery order form.
On receipts
Assigning new or existing lot numbers to incoming goods can be done directly on receipts.
To begin, go to the Purchase app to create and confirm a PO for products tracked by lot numbers. Then, click the Receipt smart button that appears at the top of the page to navigate to the warehouse receipt form.
On the receipt form, on the product line in the Operations tab, select the ⦙≣ (bulleted list) icon to the right of the product that is tracked by lot numbers.
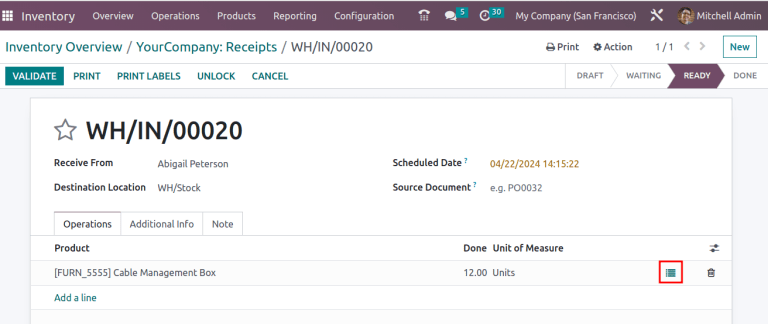
Doing so opens the Detailed Operations pop-up window, where the Lot/Serial Number and Done quantity are assigned.
The two ways to assign lot numbers are manually and copy/paste.
Manual assignment
To manually assign lot numbers, click Add a line, and choose the location the products will be stored in under the To column. Then, type a new Lot/Serial Number, and specify the Done quantity.
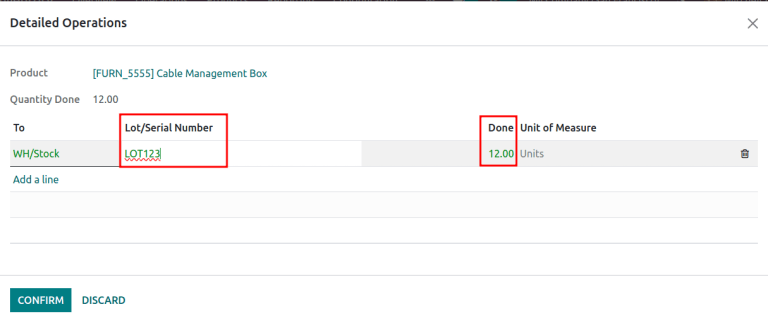
Copy and paste
From a spreadsheet with all of the lot numbers received from the supplier (or manually chosen to assign upon receipt), click Add a line, and proceed to copy and paste the lot numbers, in the Lot/Serial Number column.
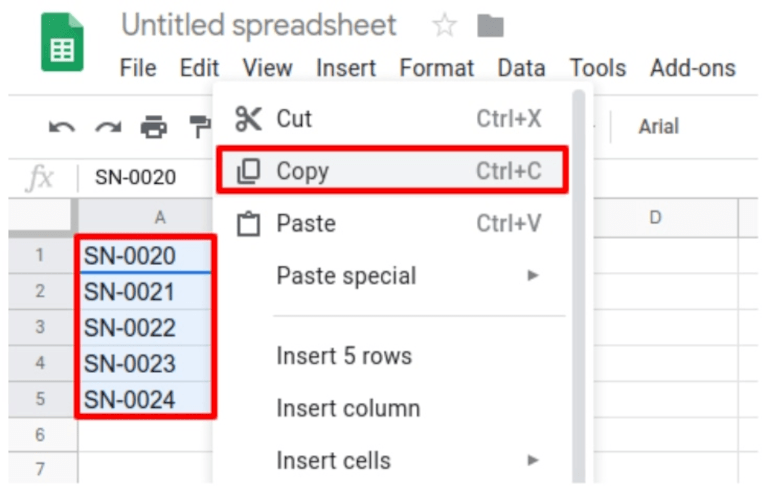
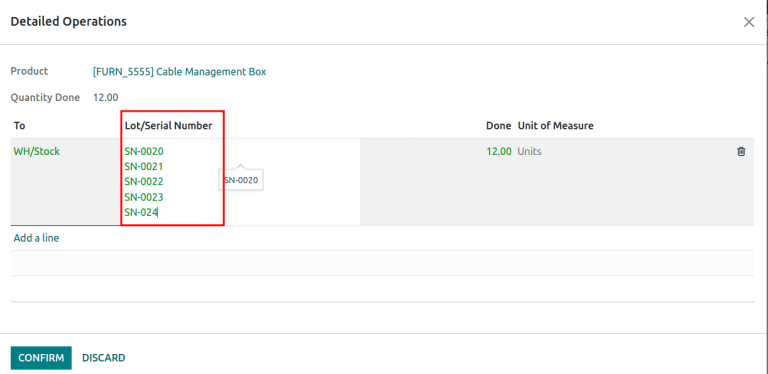
After clicking away from the text field, Odoo automatically generates the necessary lot number lines. The quantities in the Done column match the first entry. Manually adjust the To locations and Done quantities for each lot number, as needed.
Once all product quantities have been assigned a lot number, click Confirm to close the pop-up window. Then, click Validate on the receipt form.
On delivery orders
Odoo makes it possible to specify which lot numbers for a product are chosen for outgoing shipment on a delivery order form.
To begin, create or select an existing quotation from the Sales app. After confirming the SO, the Delivery smart button becomes available. Click the Delivery smart button to view the warehouse receipt form for that specific SO.
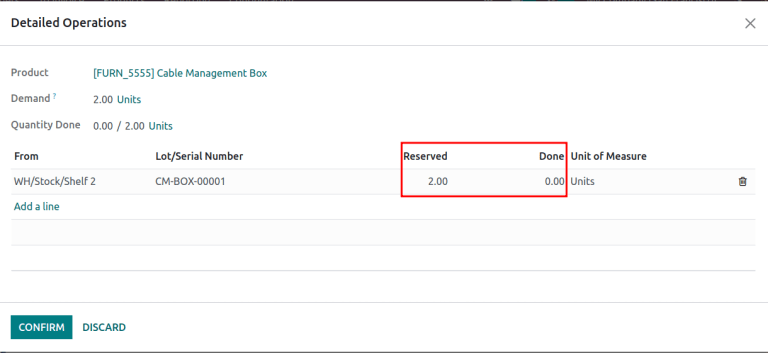
Clicking the Delivery smart button opens the the delivery order form, where lot numbers are picked for delivery. In the Operations tab, click the ⦙≣ (bulleted list) icon to the right of the product that is tracked by lot numbers. Clicking that icon reveals a Detailed Operations pop-up window.
In the Detailed Operations pop-up window, a Lot/Serial Number is chosen, with the full Reserved quantity taken from that specific lot (if there is enough stock in that particular lot).
If there is insufficient stock in that lot, or if partial quantities of the Demand should be taken from multiple lots, change the quantity in the Done column to only include that specific part of the total quantity.
See also
Next, click Add a line, select a different Lot/Serial Number, apply the remaining Done quantities, and click Confirm to close the pop-up window. Lastly, click the Validate button to deliver the products.
Lot management
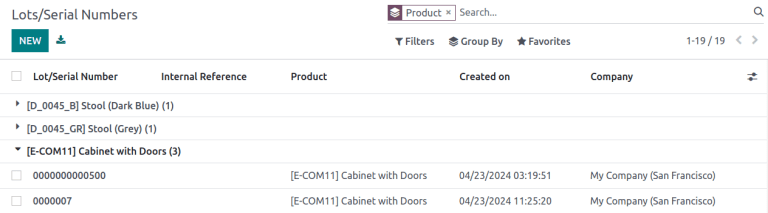
Manage and view existing lot numbers for products in the Lot/Serial Numbers dashboard by going to Inventory app -> Products -> Lots/Serial Numbers.
By default, lot numbers are grouped by product, and selecting the drop-down menu for each product displays the existing lot numbers. Select a lot number to modify or add details linked to the lot. Lot numbers can also be created from this page, by clicking the New button.
Modify lot
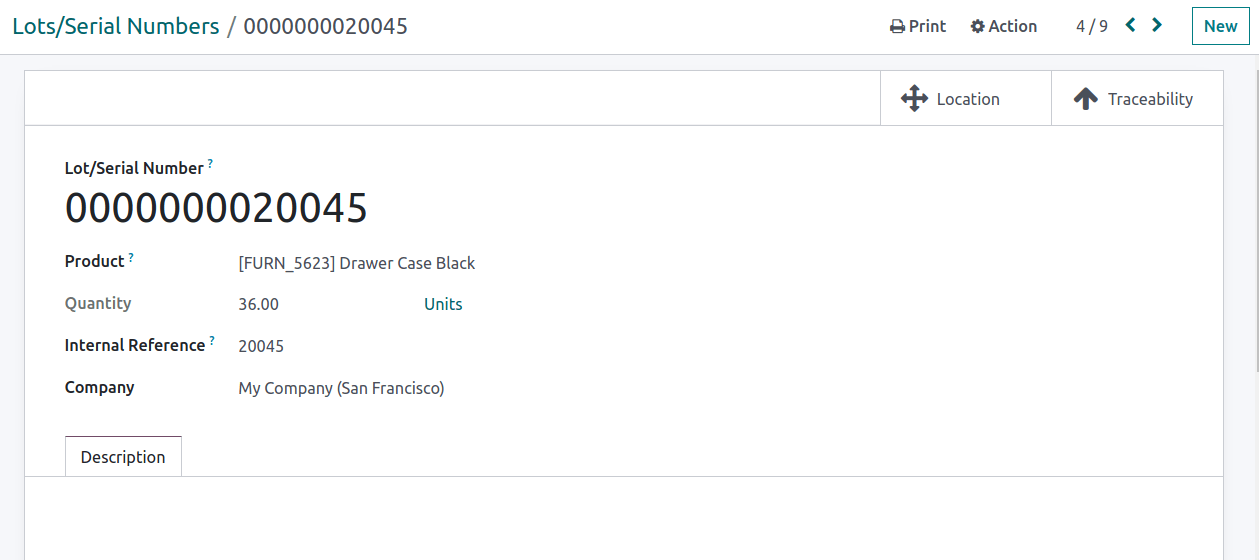
Clicking a lot from the Lot/Serial Number dashboard reveals a separate page where additional information can be provided about the lot.
On the lot number form, the following fields can be modified:
- Lot/Serial Number: Change the lot number linked to the Product
- Internal Reference: Records an alternative lot/serial number used within the warehouse that differs from the one used by the supplier manufacturer.
- Company: Specify the company where the lot number is available.
- Description: Add extra details about the lot or serial number in this text field.
See also
Set expiration dates for lots
Reserve lot number for a product
To create a lot number for a product, begin by going to Inventory app -> Products -> Lot/Serial Numbers, and click New.
Once the new Lot/Serial Number is generated, click the blank field next to Product to reveal a drop-down menu. From this menu, select the product to which this new number will be assigned.
After a new lot number has been created, saved, and assigned to the desired product, the lot number is saved as an existing lot number linked to the product, and can be selected when assigning lot numbers to products on a receipt, or when making an inventory adjustment.
Manage lots for different operations types
By default, new lots can only be created when receiving products, and existing lot numbers cannot be used. For sales orders, only existing lot numbers can be utilized, and new ones cannot be created on the delivery order.
To change the ability to use new (or existing) lot numbers on any operation type, go to the Inventory app -> Configuration -> Operations Types, and select the desired operation type.
On the operation type form, under the Lots/Serial Numbers section, tick the Create New checkbox to enable new lot numbers to be created during this operation type. Choose Use Existing ones if only existing lot numbers can be selected.

Traceability
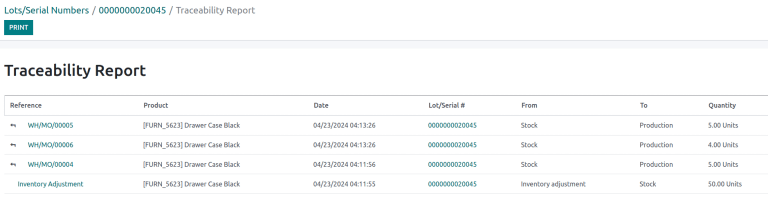
Manufacturers and companies can refer to traceability reports to see the entire lifecycle of a product: where it came from, when it arrived, where it was stored, who it went to (and when).
To see the full traceability of a product, or group by lots, go to the Inventory app -> Products -> Lots/Serial Numbers. Doing so reveals the Lots/Serial Numbers dashboard.
From here, products with lot numbers assigned to them will be listed by default, and can be expanded to show the lot numbers those products have assigned to them.
To group by lots, begin by removing any filters in the Search... bar. Then, click the Group By drop-down menu, select Add Custom Group, and select Lot/Serial Number from the drop-down menu. Then, click Apply.
Doing so displays all existing lots and serial numbers, and can be expanded to show all quantities of products with that assigned number.

Traceability report
To view a full stock moves report for a lot number, select the lot number line from the Lots/Serial Number dashboard. On the lot number form, click the Traceability smart button.
See also