Scrap inventory
In some cases, a product in inventory may be damaged or found to be defective. If it is not possible to repair or return the product, Odoo Inventory allows users to scrap it, ensuring that usable inventory counts remain accurate.
By default, scrapping a product removes it from physical inventory, and places it in a virtual location titled Virtual Locations/Scrap. A virtual location is not a physical space, but rather a designation in Odoo that is used to track items that are no longer in physical inventory.
Scrap from stock
To scrap a product located in inventory, begin by navigating to Inventory -> Operations -> Scrap. On the Scrap Orders page, click Create to configure a new scrap order.
On the scrap order, select the product being scrapped from the Product drop-down menu, then enter the quantity in the Quantity field. The Source Location defaults to the location where the product is stored, and the Scrap Location defaults to Virtual Locations/Scrap, but either of these can be changed by selecting a different location from their respective drop-down menus.
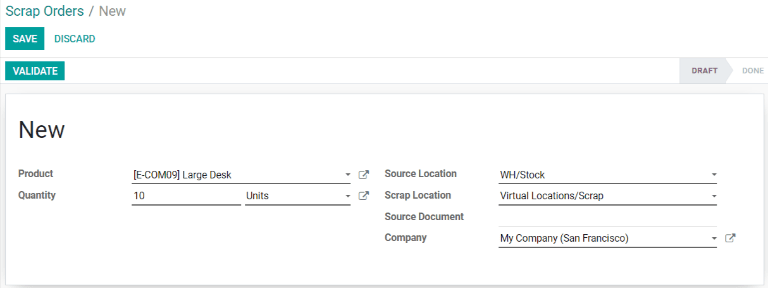
Finally, click Validate to scrap the product. The on-hand inventory count for the scrapped product updates to subtract the scrapped quantity.
Scrap from a receipt, transfer, or delivery
It is also possible to scrap products during the receipt, transfer, and delivery operations. This can be necessary if any products are found to be defective when receiving them into inventory, transferring them from one location to another, or preparing them for delivery.
To scrap a product during the receipt, transfer, or delivery operations, begin by navigating to the Inventory app. On the Overview page, select the # TO PROCESS button on the Receipts, Internal Transfers, or Delivery Orders card, depending on the type of operation the product is being scrapped from.
Alternatively, a list of all delivery orders, receipts, and transfers can be viewed by navigating to Inventory -> Operations -> Transfers.
Next, open a delivery order, receipt, or transfer from the corresponding page by clicking on it. A Scrap button appears at the top of the page. Click it to open the Scrap pop-up window.
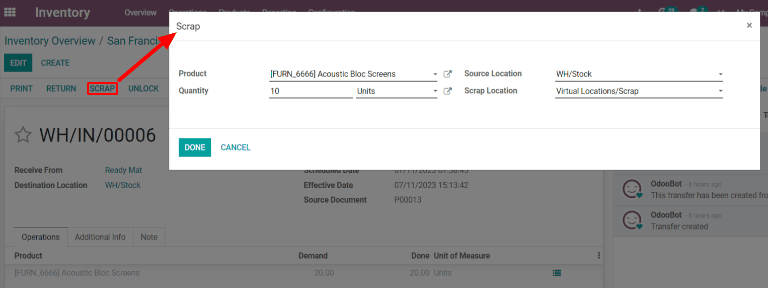
On the Scrap pop-up window, select the product being scrapped from the Product drop-down menu. Then, enter the quantity in the Quantity field.
The Source Location defaults to the location where the product is stored, and the Scrap Location defaults to Virtual Locations/Scrap, but either of these can be changed by selecting a different location from their respective drop-down menus.
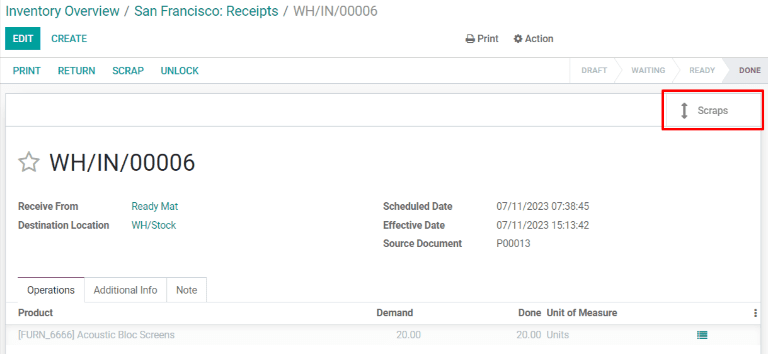
Finally, click Done to scrap the product. After doing so, the Scrap pop-up window disappears and a Scraps smart button appears in the top right of the page. Click it to view all of the scrap orders created from that operation.